Showing posts with label painting. Show all posts

Best Arts & Crafts for Kids and {Learn & Play Link Up}

Wednesday, 3 February 2016

Years ago, Mavi would do a lot of artist study.  One of my favorites is our Van Gogh project, The Sunflower.  It was one of those rare moment wherein both Mavi and I were in depth with our subject and were absorbed by the beauty of painting.  But it was just more than artwork. We studied the life of Van Gogh, and how his life reflected in his work.  (click the image below for more details)

DSC_0709_thumb[5]

Now thinking about it, I picked the best art projects and crafts in our link up this week.  Here are the featured post:

Featured posts:

Renoir Art Project for Kids from The Sunny Patch

Henna Hands Craft from Royal Little Lambs

Solar System Art with Forks and Bubbles from The Practical Mom Blog

Valentines Day Art Activities from Sugar Spice and Glitter

Heart Print Valentine Art Project for Preschoolers from Fun a Day

Salt Dough Hand and Foot Heart Keepsake from Rhythm of Play


Welcome to the Learn & Play Link Party!

11206071_10206383760770609_4191824351964193280_n
Now it’s time for this week’s link party! This is a BRAND new link up for all blog posts that include learn and play activities and hands-on education for kids. We are excited to read your blog posts and to see what you have to share! Please link up below and grab our button to display on your blog.
If you are a blogger, share your family friendly posts here. We are looking for things which include:
  • Montessori Education
  • Homeschool
  • Sensory Play
  • Tot and Preschool Trays
  • Fine and Gross Motor Activities
  • Kids in the Kitchen
  • Healthy Recipes for Kids
  • Arts and Crafts
  • Natural Living
  • Free Educational Printables
  • Family-Oriented Activities
  • Healthy LivingYour post will be featured on each of our blogs where we will pick our favourite posts every other week. That means there is more of a chance that you will be featured!
     

    Everyone, please meet our link party hosts:

    learn and play party hostesses

    Christian Montessori Blog ~ Please visit our CMN FB group ~ Pinterest

    Vanessa from Mama’s Happy Hive~FB~Pinterest~Instagram~Twitter

    Jennifer from Study at Home Mama~FB~Pinterest~Instagram~Twitter

    Marie from Child Led Life~FB~Pinterest~Instagram~Twitter

    Jae from Pinay Homeschooler~FB~Pinterest~Instagram~Twitter

    Heather from Golden Reflections Blog~FB~Pinterest~Instagram~Twitter

    Renae from Every Star is Different~FB~Pinterest


    GUIDELINES FOR LINKING

  • Please link up 1-3 posts
  • Follow each of the hosts on social media
  • When you link up, please add our button and place it at the bottom of your shared posts or link back with text link.
  • By entering a link, you’re giving us permission to feature an image on our blogs. Proper credit & links will ALWAYS be given.
  • Please visit a couple of shared posts and leave a comment for them
  • Remember that you must link back in order to be featured

     Grab This Button:

    Christian Montessori Network

    <div align="center"><a href="http://christianmontessorinetwork.com/category/learn-and-play" title="Christian Montessori Network"><img src="http://www.christianmontessorinetwork.com/wp-content/uploads/2015/04/learn-and-play-link-up-150-150.png" alt="Christian Montessori Network" style="border:none;" /></a></div>


    Please Follow
    Follow Pinay Homeschooler's board Pinay Homeschooler on Pinterest.


  • Artist Study ~ Leonardo da Vinci (Making Portraits)

    Friday, 20 March 2015

    I am rebooting our Artist Study and we’re starting with portraits.  Now this project was inspired by Leonardo da Vinci. See our previous activities with Leonardo da Vinci here.

    To know more about this genius artist and for inspiration, we first examine his life. We used this amazing book from the library, Levelled Biographies: Leonardo da Vinci[aff. link].  We enjoyed the book, and Mavi loved learning about Leonardo, not just as an artist but as a scientist as well. The book is appropriate for kids as it has a simple way of telling a biography and has lots of pictures in it.

    Aside from learning about Leonardo, we also talked about portraits. I showed Mavi random samples in the web.  Then I took some photos of him outdoor to demonstrate what’s the difference between a portrait and an ordinary picture.  (You can also do this with your kids!) After which, we started making our portraits.  We used the DSS lesson for  the tutorial and some inspirations.

    To create portraits, we used two mediums:  oil pastel and tempera paint.  Mavi wanted to use oil pastels (I never liked them!) as this is what they mostly use in school. So I guess he’s quite confident with it.PortraitsPastel

    As you can see I also tried creating my portrait using the pastel but the black which I used for the outline started to mess with my peach coloured face! I just have to stop because my portrait is starting to look messy.

    Now this is Mavi’s portrait made from oil pastel. He’s so happy with his work :D  Portrait1

    Second try, we used tempera paints.  I like using paints! Easier to handle and less messy.  PortraitsTempera

    And this is our finished product :) 

    portraits

    Tempera paints, oil pastels and other art materials can be purchased through Amazon, Target or any craft store available.

    Mavi pointed out he doesn’t know how to make a nose and a mouth … so we’ll he'll be practising more.

    Now this is an activity that you can easily do with your kids.  You can use any medium available, pencil, crayons or watercolour.  Discuss what is a portrait and what do they imagine to be in that portrait.  You can also talk about the back of your portrait, whether they wanted to be indoor or in the park, under the sun, the beach etc.

    Like my post? More activities here!

    Follow Pinay Homeschooler's board Pinay Homeschooler on Pinterest.

    St. Patrick’s Day Activities for Tiny Tots

    Sunday, 1 March 2015

    StPatrickDayTinyTots

    I am not really a fan of seasonal themed activities. Why? Well for a busy Mom like me, it is sooo difficult to prepare and assemble.  The fact that we live far far away from the city, our resources is quite limited. It is sooo hard to find materials that fits well on a specific theme (and I have no time to look for them either!).  Plus the fact that well, these stuff still cost a lot and space is my biggest problem here. Not enough storage for the materials! 

    But… we all have to agree that it is fun to do it with your little kids.  It’s cute and fun! And the kids will have that feel of the occasion.  That’s why, because this month we are celebrating St. Patrick’s Day here in Ireland,  I am trying it out this seasonal themed activities with Vito!  Yes, I’m testing the water and see if I can pull off a seasonal themed activities and let’s see were this will lead me.  We’re not doing a bunch right, we’re only trying those that are easy to prepare and feasible for us.

    Scooping giant pompoms 

                     20150301_130913 20150301_131029

    Vito has been showing signs that he’s ready.  He always wanted to feed himself so I’m giving him lots of scooping activities so he can practice.

    Materials:  giant pompoms (or berries or baby potatoes), plastic scoop from oatmeal box, plastic bowls

    Recognizing the rainbow colours

    DSC_0721 (2) 

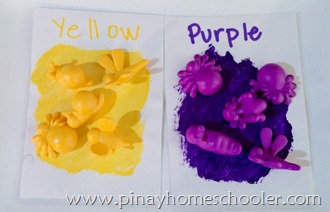
    We’ve looking at colours since last year and though we may have one colour per month, it won’t hurt to checkout different colours at the same time. Here I was talking to Vito all about the rainbow its colours.  We use my Learning Resources Critters Counters which I got from an Amazon Sale last year.  I was pretty happy that they have all the 6 colours of rainbow!

                        20150301_132453 20150301_132637

    Materials:  colour cards (from flash cards, cardstock, art paper) and counters (or erasers/rubbers, pompoms, toy beads etc)

     Language and Vocabulary
    20150301_132850 

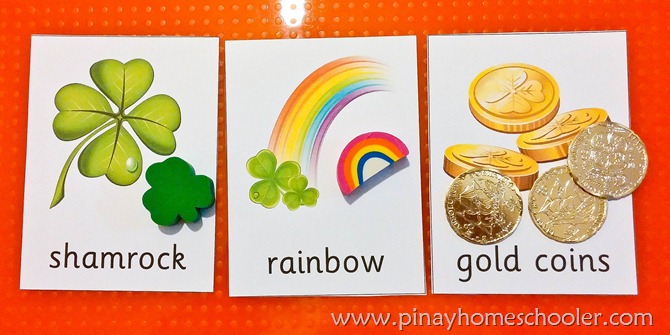
    So you might think that it’s too early for your little ones to understand all of these?  You might be mistaken! They actually absorb all the little things you show them!  Currently, there’s a lot of displays of leprechauns, rainbows, shamrock etc at the stores and malls. Vito sees all of these whenever we’re outdoors.  So what I did here was provide some beautiful cards with a clear readable font for infants (I used Sassoon Infant Std, standard font used here in UK and Ireland) and added tangible objects so I can show and explain to him what he is seeing everywhere.

    Materials:  St. Patrick’s vocabulary cards (downloadable from this post, follow link at the end of this post), matching objects

    Gold Counting Activity and Number Recognition
    DSC_0799 (2)

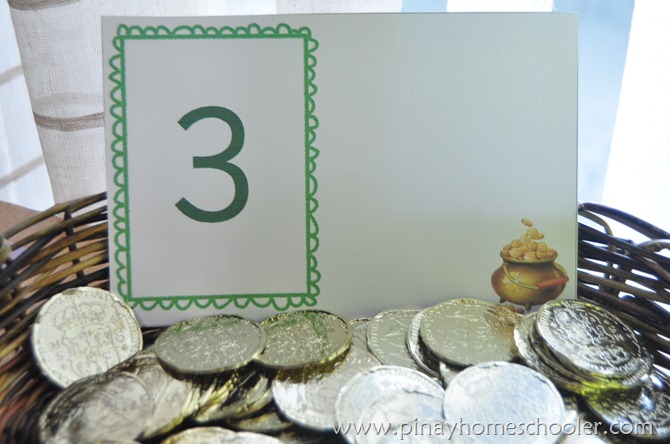
    I made counting cards as well and used some play gold coins for this.  Since the starting of the year, I’ve been introducing Vito to counting by counting his fingers, his toes, the buttons we’re playing, the blocks and anything at all. So here, I introduced counting with the symbol.  Again, there’s no such thing as too early or too late.

    Materials: counting cards (downloadable from this post, follow link at the end of this post),

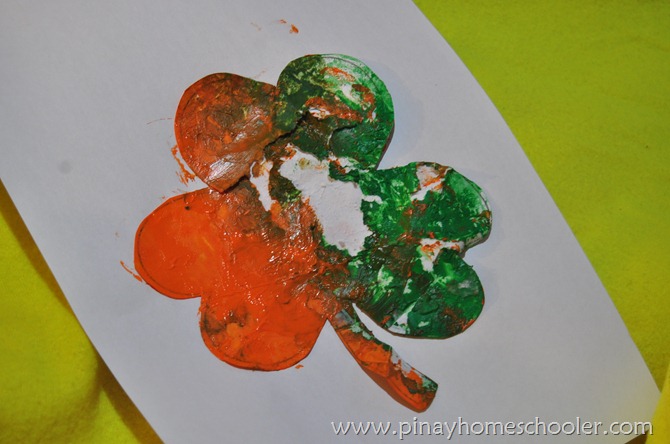
    Mess Free Shamrock Painting

    DSC_0813 (2)

    Materials: sealable plastic bag, printed shamrock (you can get the outline in the web), orange and green non-toxic tempera paints

    Put everything in the plastic bag… and let the fun begin!

    DSC_0825 (2)

    Vito’s shamrock masterpiece (after he basically torture the plastic!)
    DSC_0828 (2)

    And there goes our activities for St Patrick’s Day!  Even if these are all for Vito, big brother loved doing all of these as well! How cool isn’t it?

    Now for your freebie, download your FREE COPY OF ST. PATRICK’S DAY printable, the TINY TOTS EDITION here!

    More toddler activities can be found here in my Pinterest Board: Follow Pinay Homeschooler's board Pinay Homeschooler on Pinterest.

    12 Practical Life Christmas Activities: On the 5th day…

    Monday, 8 December 2014

    Painting a Monet-inspired Christmas tree.

    Remember how I raved about the books of James Mayhew (the Katie series)? We'll one of our favourite books is the Katie Meets the Impressionist [aff. link]. We talked about the style of Monet and why he is called an “impressionist” artist.

    DSC_2545_thumb[4][5] 

    And since its Christmas, we use the Christmas tree as an inspiration.

    Below, we work together all the time. His and hers.

    DSC_0255

    We dabbed and smeared our drawing paper with green for the tree. He used a pencil to draw a triangle outline as guide which is not visible in the picture.  Then we added details for the balls, lights, stars and presents under the tree.

     DSC_0256

    Here’s my tree.

     DSC_0288

    Mavi’s tree.

    DSC_0281

    Now here’s a macro look of our tree…

                             DSC_0273 DSC_0276

    Colorwheel Flowers

    Wednesday, 19 November 2014

    I came across this project at Deep Sparkle and decided to try this with Mavi.  I love how simple the project is and it uses basic colour combinations.  Since the project involves the colorwheel, Mavi and I revisited our basic art lessons about colours a few years ago. We talked about the primary and the secondary colours and how the are organised in a wheel type figure so we can easily remember the colour combinations.

                           DSC_0814_thumb1 DSC_0875[5]

    Read about colour theory I and colour theory II.collage

    Mavi worked on the red, orange, green and yellow combinations, while I painted a blue-violet flower combination.  And here’s how they looked like after we added  black and white paint details.DSC_0784

    DSC_0788

    The flowers turned out really good and the colours were vibrant! You can see these hanging in Mavi’s room as of the moment.

    For the details of the projects, click this link from Deep Sparkle.

    Linking to:

    Montessori Monday
    TGIF Linky Party
    Teach Beside Me
    Preschool Corner
    Teaching Mama
    I Can Teach My Child
    Home + School = Afterschool!
    Share It Saturday
    The Natural Homeschool

    Color Gradient Painting

    Sunday, 19 October 2014

    We try to have an art class every Friday as what I indicated in our October Calendar.    I bought new sets of paint last week, they’re 80% organic, non-toxic, water washable and doesn’t have the strong smell like that of Crayola.  So my son had a renew interest in painting and he’s been doing it randomly not just during Friday.

    This idea was from a picture I saw in my Facebook newsfeed and I wanted to try it with Mavi, teaching him the colour progression… from light to dark or the other way around.

    GRADIENT copy 

    He picked the primary colours and the green. We added 3 drops of white paint each time we lighten the colours.  Son totally enjoyed this activity!  He especially loves the part wherein we changes the shade of the colour and he gets excited to see the effect. 

    DSC_0508 

    So here’s Mavi’s work and mine. I didn’t get to finish my work as I ended up assisting him in his colour mixtures.

    DSC_0518 

    As an extra work, he ended up mixing the primary colours…. to produce secondary colours so he can paint a rainbow. A few years ago we had colour mixing activities, you can pay it a visit as it became really popular and was featured in other blogs as well.

     DSC_0525

     DSC_0527 

    I’m so happy of his renewed interest! And with the new paints, I can allow him to do lots of art works without worrying of the strong paint smell :D

    Follow Pinay Homeschooler's board Art and Crafty Inspirations on Pinterest.

    Still Life 101 ~ Apples

    Tuesday, 26 February 2013

    We haven’t done any painting activities for quite a while now.  So I was inspired when I came across this blog of an art teacher.   This site is full of wonderful art projects for little ones and are so easy to emulate. And I said to myself that we have to try her works!

    We started with Still Life.  As inspired by one of her art projects for kindergartens, I salvaged some of the apples from the fridge and use it as our subject. Please excuse some of the stains in the mat and plate, prior to this, my son has been playing with them LOL.  So by the time I took the photo, one apple has a bite mark, the paper plate has Nutella on the side and the mat has some orange watercolor stains.

    DSC_0526

    To start with, I created the outlines using a drafting compass.  Using a plastic spoon, we swirled (circular motion) the red tempera paint on each smaller circles.  Then we let it dry for about 3-4 hrs.

    DSC_0491

                  DSC_0494 DSC_0502 

    When it was ready, I let him trace the outline of the apples and plate using a black permanent pen.  Then he added details for the apples as well.

    DSC_0507

    We completed the work by applying green watercolors on the background and yellow on the plate. 

    DSC_0512

     DSC_0514

    And here’s the finish product. Tada! He loved his work so much that he placed this in our hallway (his gallery LOL).  I am amazed on how he can finally follow instructions with regards to painting and enjoy the activity as well.  He told me we should paint the muffins next :)

    DSC_0521

    Linking to:

    Montessori Monday
    Preschool Corner
    TGIF Linky Party
    Hip Homeschool Hop
    Teach Beside Me

    Planets and the Solar System

    Tuesday, 7 August 2012

    Saw this book from the library and I thought my son would like it.

    11503189 

    And he did!  The book got lots of interesting images of the planets and is loaded of information which are very easy for an almost 4 yr old to understand.  I also love that each planet were discussed and has trivia on each one.

                             DSC_0821DSC_0825

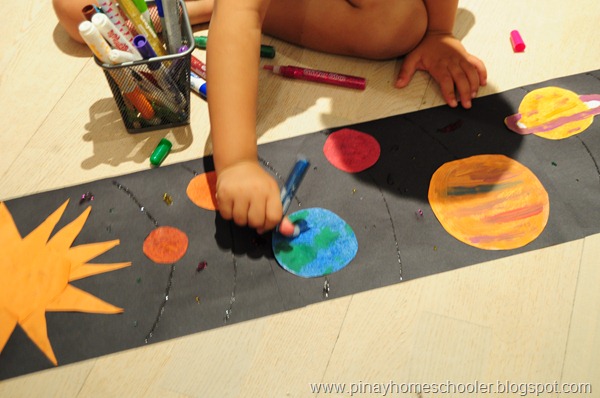
    Later we made planets using paints.   As we paint each planet, we first refer to the book, discuss the color and try mixing the paints so we can come up with the exact color as presented in the book. And this is how they look like as we wait for them to dry up.DSC_0839

    Once they’re cooked, I cut them up so we can glue them on a black cardstock.  They look absolutely perfect!

    DSC_0847

    My son started cutting the orange paper for his Sun.DSC_0848

    Then we glue them on the cardstock.  We talk about the order  of the planets in the solar system as we glue them.  Here it seen that he is adding glitters on our space. 

    DSC_0852

    DSC_0854 

    Then we waited again for them to dry so we can start playing with it using our Safari Space Toob. DSC_0869

    Linking this to: 

    Montessori Monday